Share
Pin
Tweet
Send
Share
Send
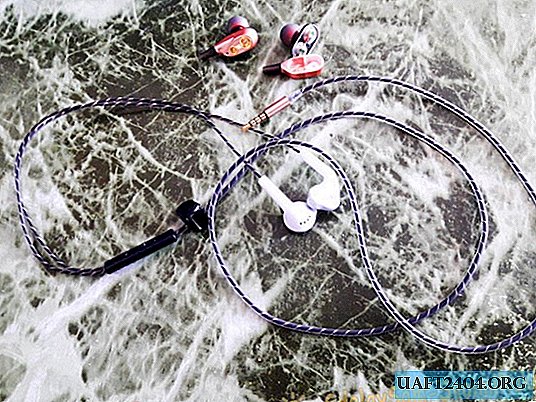
And in order not to throw money away, buying a fake, you can quite easily and quickly repair the old ones. The sound, of course, will also not be exactly the same as before, but here we at least win by not having to spend money on a replica, and it will be possible to postpone the money saved, which will be useful when buying original headphones. With the soldering of two pairs of wires, I think, anyone who has ever seen such a simple device as an electric soldering iron can handle it. Nothing complicated here. First of all, it is necessary to identify the problem spot. That is a breakdown of old headphones. In inexpensive, medium-quality headphones, the plug most often fails. More precisely, the place where the plug is connected to the cable. It often breaks off the wiring inside the braid, due to frequent excesses and vibrations. Well, high-quality, good headphones are usually made to last and are not subject to such defects - they work to the last, and almost always fail due to wear of the speakers.

Rather, the membrane of the speakers. Nothing can be done about it - everything has its own term of work. The speakers, due to aging and wear of this membrane itself, begin to produce a distorted sound, wheezing and cracking. That's about changing worn speakers today and we will talk.
Will need
- Soldering iron, tin and flux.
- Scissors.
- Stationery knife.
- Small pliers.
- It may take a second glue (although I managed).
- Broken headphones with undamaged speakers.

Headphone Repair
Surely, for every music lover and music lover, there is such a box with old and broken headphones.

When repairing your favorite headphones, you can go in two ways. First: replace the damaged speakers themselves, inside the headphone housings. And the second; if you can’t find the right size and shape of the speakers, change the earphone shell itself along with the speakers. In the second option, you have to sacrifice the appearance, for whom it is important. No, they won’t look ugly or messy, they just lose the look of the original. Suitable and, most importantly, two SAME (this is important!), In my case of four, I did not find any speakers in my reserves, so let's go the second way. Although, replacement technologies are not much different. In fact, it turns out more likely to replace damaged parts with workers, rather than repair. But, I think, it can, nevertheless, be attributed to the repair, because in the end we will get a working headset, assembled from two damaged ones. So, for starters, you need to pick up old, or broken headphones, which left the speakers intact.

Next, you need to disassemble the headphones themselves to remove them from the cable. Carefully disassemble! In some headphones, on the speaker, on top of the membrane, there may be a brass ring that is attached to the plastic grille with double tape. If during disassembling such a design, the parts to be disassembled sharply can be easily separated from the speaker. I.e; the membrane will remain on the grill, and the rest of the speaker in the earphone, and this is beyond repair. Already faced with this. Therefore, remove the round plastic grate should be very careful.


After you have separated the speaker grilles from the rest of the case, you need to unsolder the two wires from the speaker contacts. Put the soldered speakers aside. Now remove the headphone cable from the cables. You can cut the cable with scissors, but I untied the knot that was tied to the cable inside the earpiece. This node plays the role of a limiter so that no one accidentally tears the cable out of the headphone. So, the headphones are separated from the old cable. Now we disassemble those headphones that we are going to use in the future. The procedures are the same as in the description above.


Only in these headphones, for some reason, instead of a restrictive unit, there were metal braces.

They are also designed to fix the cable inside the case. Remove these brackets from the cable, and pull the cable out of the case. Repeat the procedure with the second ear.

Next, we collect the headphones in the reverse order, only with other, not spoiled parts. Pass the cable into the housing.


Solder the cable to the speaker pins. And do not forget about the bounding bracket.


We snap the grille with a speaker on the headphone housing.

We repeat everything with the second earphone. Well, the headphones are ready.

You can use it. And by the way, the sound has changed very slightly; less bass. But it is understandable, the previous headphones had two small speakers each, and here one big one. But it affected only the bass, nothing more. But in return for the lost bass, the headphones turned up in volume. Somewhere, one and a half times! This happened, apparently, due to the large speakers. Generally; Headphones turned out pretty good. Do not crack, do not hiss. The sound is clear. The result is shown in the video at the end of the article. So, from two pairs of spoiled headphones, we easily assembled some normal ones.

Share
Pin
Tweet
Send
Share
Send

