Share
Pin
Tweet
Send
Share
Send
What is common between a sledgehammer, an ax and a hammer? Operating principle. To strike, they need a swing. Therefore, you need a handle, and the heavier the tool, the, as a rule, it is longer.
During the backswing, the centrifugal force acts on the metal part of the tool, which tends to tear it from the handle. Moreover, this force is greater, the more massive the head and the longer the handle of an ax, sledgehammer or hammer.
Traditionally, to strengthen the head on the handle, a wooden wedge is driven into its end after planting the metal part. Sometimes at an angle to the main wedge one or two smaller metal ones are driven in.
But there are alternative ways of reliably securing parts of the above tools relative to each other. Below we consider and practically implement one of them.

We put a hammer on the handle without a wedge using rubber

The handle can be purchased at a hardware store or made from hardwood, which include: oak, birch, maple, mountain ash, beech, ash, dogwood and others. When choosing, you should pay attention to the end face of the workpiece and focus on the one in which the annual rings are longitudinally and not transversely. Such a handle will be stronger and will last longer.
It is believed that the slot on the handle for driving a wedge weakens it. If rubber is used for a reliable attachment of the hammer head to the handle, then weakening does not occur, since there is no need for a wedge fastening, and therefore a slot.

It is necessary to prepare the handle blank for the nozzle. To do this, we adjust the side with a smaller cross section under the hole in the head using a carpentry knife, a file on a tree or an emery wheel. The landing part of the handle should freely enter the hole in the head without interference, and correspond to it in length.
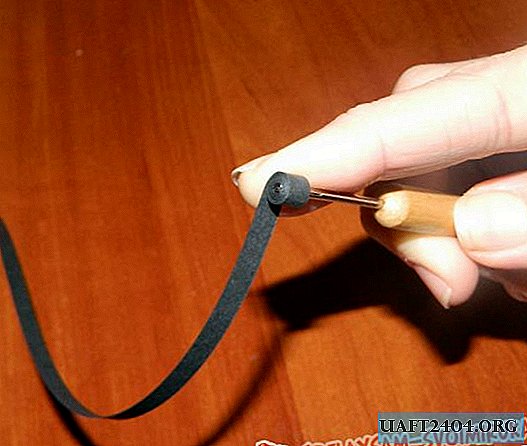
Next, we cut out a strip from the bicycle chamber or any elastic rubber, which should provide a girth along the girth of the handle with some clearance, and have a margin of about 1 cm in width on both sides.

Lubricate the rubber surface from the outside with lithol to facilitate the packing process.


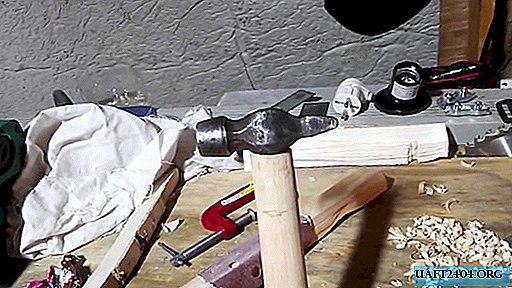
To do this, hit the opposite end of the handle on a stable surface. It is best if it is a massive wood chock.


After making sure that the hammer head is in place, we remove the squeezed excess of lithol with a rag and cut off the rubber ends on both sides of the hammer head with a sharp knife, so to speak, flush.


Then we gently cover the interface between the hammer’s landing hole and the handle with glue (PVA, Moment, or something similar). We do this, on the one hand, in order to strengthen the connection, but mainly so that moisture does not penetrate into the connection between the hammer head and the handle. After all, water, being in an unprotected gap, can eventually cause rotting of the wood and oxidation of the metal, which will inevitably lead to a weakening of the fastening and failure of the tool.

What is the advantage of such a stick landing in the hammer head? The presence of a rubber layer between the parts of the tool isolates the handle from the head and the impact force of the striker on another hard surface is extinguished and the hand does not experience all the energy of hard and sharp contact.

All of the above can be repeated one to one, both with an ax and a sledgehammer. The glue, of course, can bounce in places over time, so you have to restore it. The handle can be burned with a blowtorch or gas burner and then wiped thoroughly with a rag. This will give the handle a noble appearance and ease of use.
In custody
Grease of mineral origin, which includes lithol, over time has a bad effect on rubber and it begins to deteriorate. It is better to replace it with thick soapy jelly. It also facilitates the nozzle, but after the evaporation of water, it loses its sliding properties and further strengthens the connection.
To seal joints, instead of PVA and other adhesives that harden and become brittle, it is preferable to use silicone sealant, which remains always plastic, and less prone to cracking.

Since it takes considerable effort to apply a hammer, ax, or sledgehammer with rubber, the opposite end of the handle should be strengthened for the duration of the nozzle, clasped with a clamp and tightly tightened. The clamp can be replaced with construction tape or vinyl insulating tape, tightly wrapping the handle in several layers.
Also, instead of rubber, you can use a tube of galvanized sheet with a seam seam, which is worn on the handle, and inserted into the hole of the hammer. Further, as usual: several strokes and all parts take their places, and very firmly and reliably.
Share
Pin
Tweet
Send
Share
Send