Share
Pin
Tweet
Send
Share
Send
What is required for this:
1) PVA glue or gelatin for a primer.
2) Fine-grained sandpaper.
3) Acrylic paints.
4) Gouache or tempera.
5) Brushes: round "squirrel" No. 1, No. 4 or No. 5, flat "synthetics" No. 5
6) Clear varnish for wood
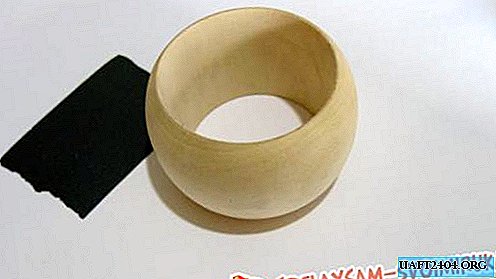
7) Wooden blank bracelet
First step. First you need to prepare the surface of the bracelet for work. First of all, it is necessary to apply a layer of soil to close the cracks and dents, which are almost always on the workpiece due to the characteristics of the material. The easiest way is to use PVA glue for the primer - it is in any stationery store, it is inexpensive and does not require additional preparation before application. However, if you want to do everything according to the technology proven over centuries, dilute gelatin according to the instructions indicated on the package, while observing the proportions of 1 part gelatin to 8 parts water. The primer is applied with a flat brush evenly over the entire surface of the workpiece, including the inside. If after application there are places where there is a little more soil, and it protrudes a little - do not rush to remove the excess layer and wait for it to dry completely. After you make sure that the soil is completely dry, you can take sandpaper. With its help, you can finally eliminate all the bumps on the surface of the workpiece.
Second phase. Now you need to apply a background layer of paint, on top of which the main part of the painting will already be applied. This part of the work is best done with acrylic paints, because after drying they are poorly soluble in water, which means that they will not mix in the application of the further drawing. The background is painted with paint diluted to a very liquid state, and it is better to do this on a previously wetted surface and extremely quickly. If this is not done, ugly stains will remain. It is worth noting that in this case the background is translucent, but if you do not like it, you can always add a few more of these layers. Traditionally, in the Gorodets painting, the background is painted either with ocher or red paint. In this case, the background layer is red.

The third stage. Gorodets painting is carried out in several main stages. To begin with, the main color of the future elements of the ornament is applied. The base of the flowers is a circle complemented by petals. Leaves are depicted as drop-shaped strokes. At this stage, it is already possible to make various additional decorative elements, and in the future to supplement them. All elements of the painting are best done with a round brush made of squirrel wool with gouache or tempera. You should start with the central objects, then moving on to additional ones.


The fourth stage. This stage is usually called the "shade." It consists in the study of part of the details of the elements of the ornament using black paint. A "shadow" is made in various ways, depending on the element. Care and caution are required here. Do not rush in the process of painting, because otherwise you can make a mistake in the position of the stroke or miss. You can use both a large brush and a brush of a smaller diameter.


The fifth stage. Now is the time to do one of the final stages - "lively". To do this, take the white paint. The process of "revival", in essence, is very similar to the process of executing the "t-shirt". It is called so, because it really enlivens the ornament, makes it more interesting and even a little voluminous. After the “revival”, it remains only to refine the small details of the painting. They are made with a thin brush in order to get as accurately as possible.


Sixth stage. After the painting is completely ready, you can cover the product with varnish. This is done so that when you wear the bracelet, the paint does not smear or scratch. It should be noted that when choosing a varnish you need to be careful. First of all, it should be colorless, otherwise it will block and discolor the paint. You also need to pay attention to how quickly and well it dries, since there are varnishes that continue to stick even after a few months. The varnish should be applied with a soft brush to avoid smearing the paint. It is necessary to varnish not only the outside of the bracelet, but also the inside. Once the varnish is completely dry, you can put on and wear a bracelet, without fear of spoiling it.


Share
Pin
Tweet
Send
Share
Send